Tech tutorials Creating a Robust Employee Directory Using SharePoint Search
By Insight Editor / 17 Nov 2016 , Updated on 21 Aug 2019 / Topics: Microsoft Azure
By Insight Editor / 17 Nov 2016 , Updated on 21 Aug 2019 / Topics: Microsoft Azure
Whether a SharePoint portal is being used in an organization for information sharing or team collaboration, one request that always seems to come up is for a "corporate phone book." This is usually a directory of employees that one can search to quickly find someone using filters such as name, location or department.
Since SharePoint receives its people details from the Active Directory (AD) to Azure AD/SharePoint synchronization and then indexes those user profiles and their metadata properties just like it does documents and list items, we can use a search results web part to show these users and their attributes in a meaningful way.
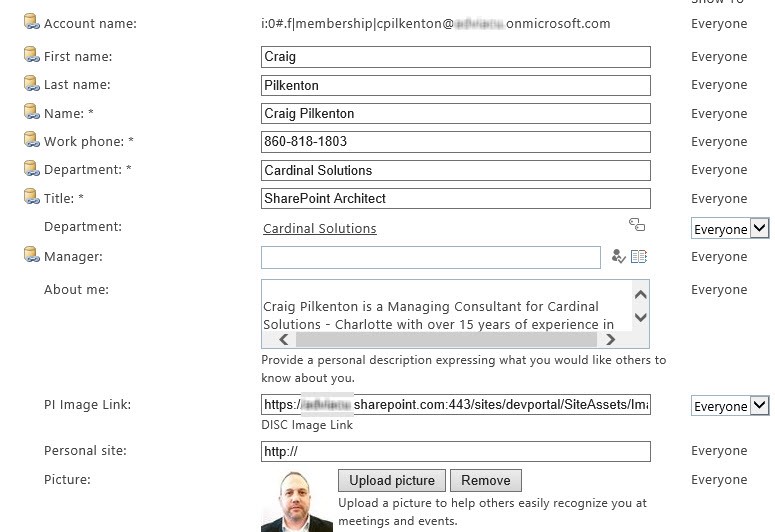
The first thing I always suggest when implementing a directory is to figure out how to display each user in the directory. It's always best practice to start from the default rendering by making a copy of the display template, then move around or add/trim sections as needed. For each user returned in the results, this new template will show the users picture with their Skype status, first/last name, job title and department if filled in from the AD to Azure AD/SharePoint synchronization.
But since the default template is designed as an 80% solution to get organizations started, we need to determine a layout that matches the business needs and styling. You'll want to create a few mockups, even if just whiteboarding them, to make sure the design will work. Then we'll figure out the details by asking some leading questions:
Now that we have the design of a new template to work from, we need to figure out which properties to pull from the search index to meet this need. We'll start by investigating the user profile service properties attached to each person synchronized into the store.
Note: You may need the help of your SharePoint or Office 365 admin to look for these properties.
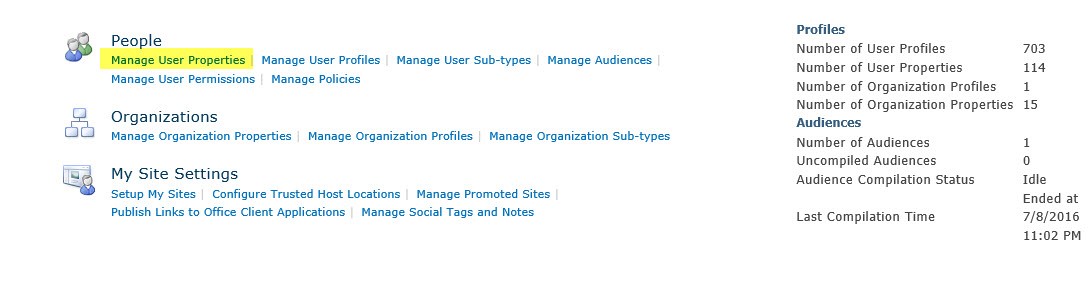
After navigating to the user profile service application, click on the Manage User Properties link under the People header. This interface is where all the existing properties are stored and updated, including their type, privacy level and if the user can self-edit. New properties that enhance a user's profile can also be created from here.
Note: Some properties are directly controlled by the synchronization from AD to Azure AD/SharePoint and cannot be altered.
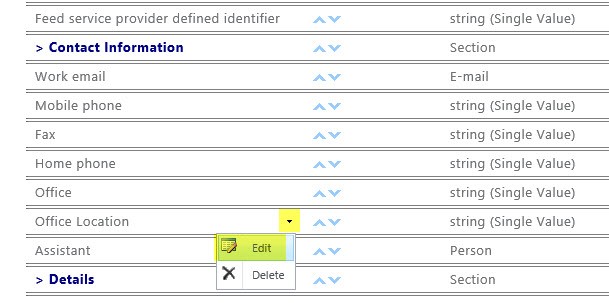
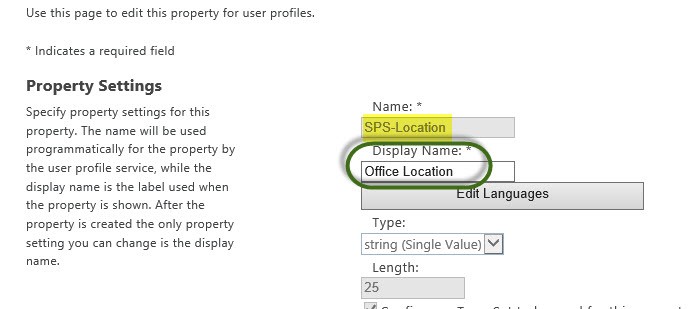
To show different user properties, we need to find the behind-the-scenes (system) name the search indexer stores them by. In the list of properties, scroll down or use Ctrl+F to look for the property you want to show in the directory. Hover over its title and click the Edit link to view its settings. After the property page loads, the first section will show the name field, which is the system name of the property, and what we'll need to use with the search index properties to pull the information in. Repeat for any other properties you need to show as well.
Note: If needing to create new user profile properties, build them and set the values in a few profiles. It may take a few hours to a day for them to show in the search index as the indexing user profiles may not be done until then, depending on your platform.
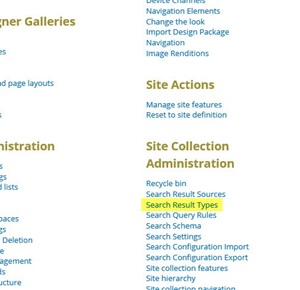
The first thing needed is to navigate to your tenant, site collection or site where you want this template used (we have all of these capabilities). Go to Site Settings and click on Result Types under the Search header.
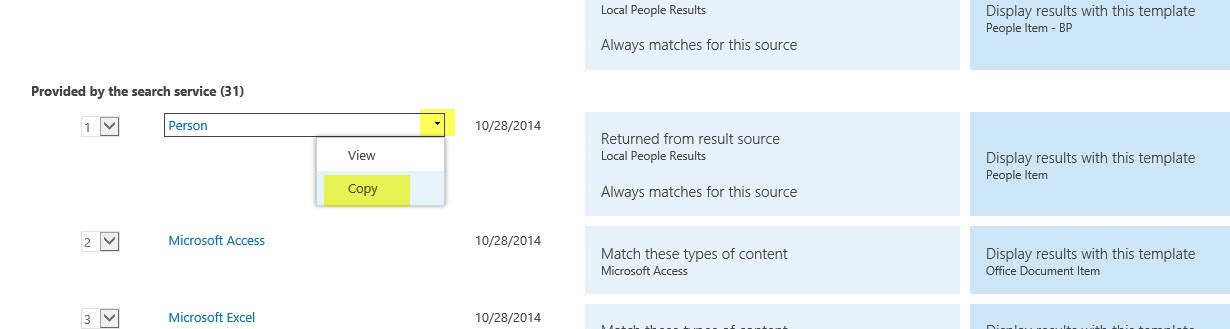
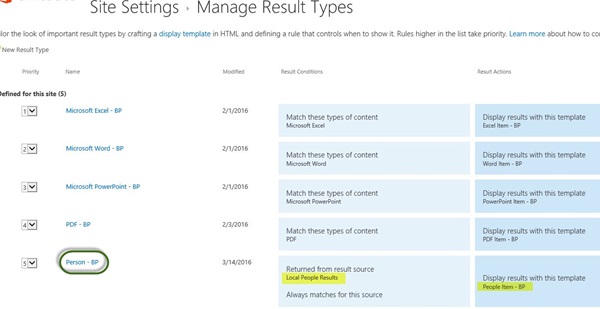
Once the Manage Result Types page loads, scroll down to beneath the section marked “Provided by the search service” and find the person result type. Hover over it until the arrow appears, then left-click on it and choose the Copy option. This will create a copy of the settings currently in use and set up the new result type that will take precedence over the default SharePoint ones.
Note: This method will make it so that every person result that shows will use this display template for the site collection/site. A different process would be needed to show just for a specific search result web part.
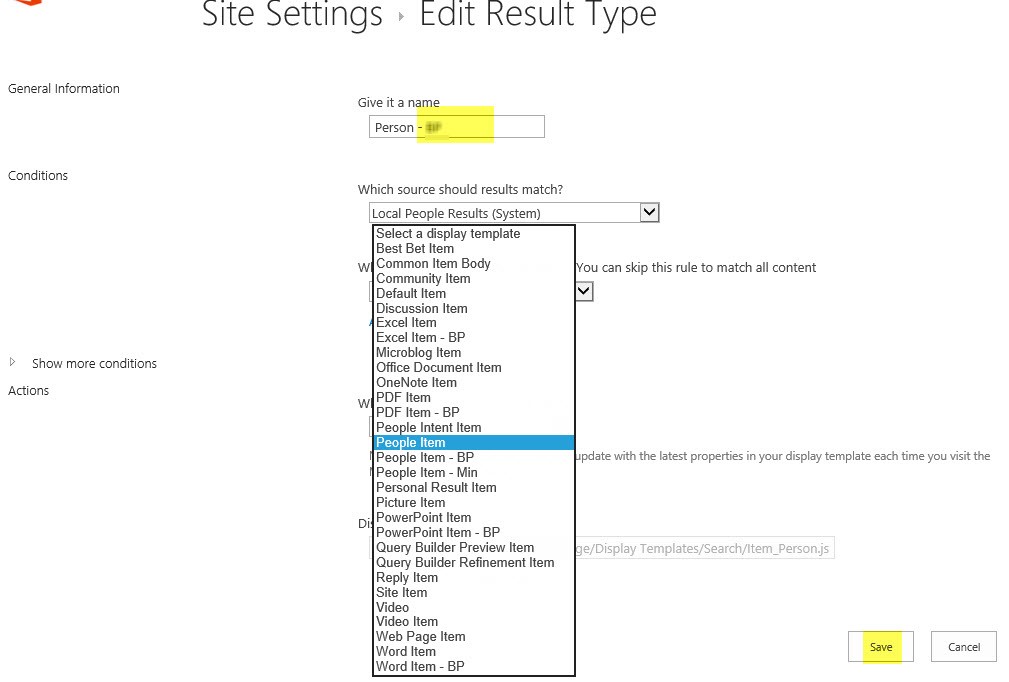
On the Edit Result Type page, append a descriptor that sets this result type apart from the default, then click Save. We'll come back here later and change the display template drop-down once we’ve created it.
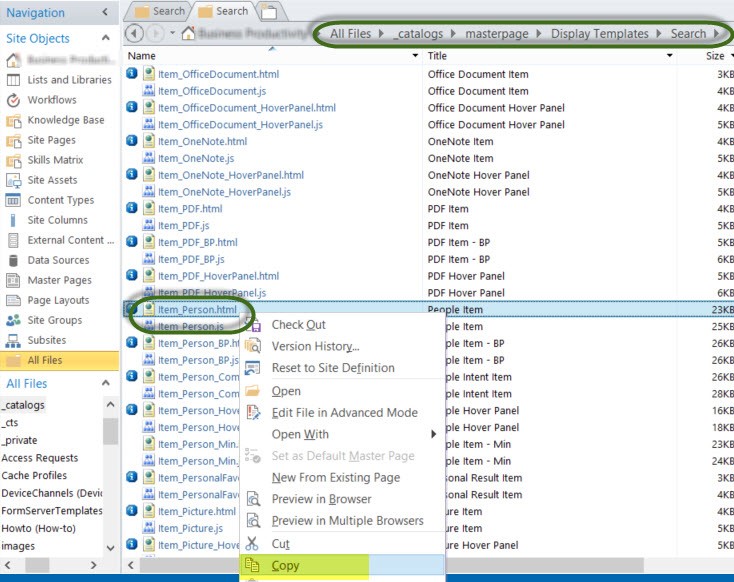
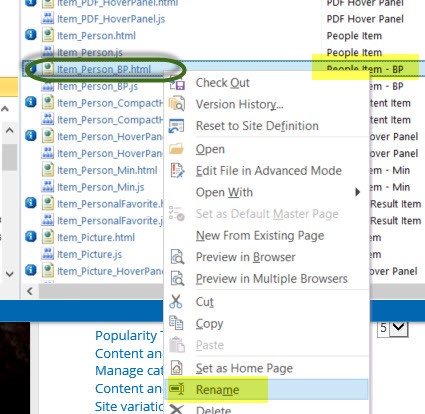
Open SharePoint Designer to our site collection/site URL. Once the tool loads our site, start in the left pane by clicking on All Files. Then in the right pane, double-click on _catalogs > masterpage > Display Templates > Search to quickly load all of the templates. Scroll down until you find a file named "Item_Person.html," then right-click on it and select the Copy choice.
After copying it, right-click anywhere in the right pane and select Paste. A new duplicate will appear in this area with a similar name. Right-click on the new HTML file and select the Rename choice, keeping the first part of the original but adding in your own descriptor. After doing this, right-click again and choose the Check Out option. Lastly, left-click in the title area and append your descriptor to the existing one. This will give it a unique name to select from when we go back into the Result Types page.
Note: After copying from the original, SharePoint will detect that this is a display template and auto-generate the JavaScript version of the file for us. This may cause the HTML not to let you change its title for the first two to four times you try, but don't give up; otherwise, you'll have trouble picking the right display template later.
After our new display template is ready, right-click on it and select the Check Out option only on the HTML file, then right-click again and select the Edit File in Advanced Mode choice to open the editor surface. Add the new index managed properties.
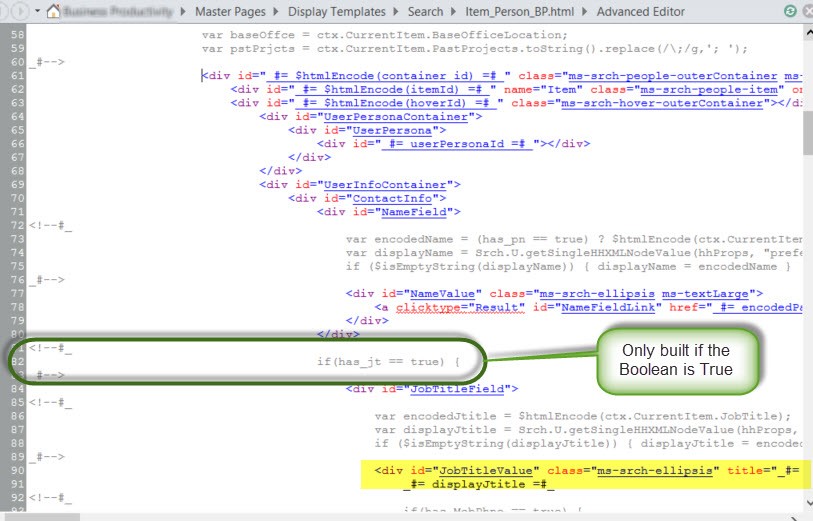
Now scroll down past the <div id="Item_Person">HTML, and you'll see the JavaScript compiler section again. Here, you'll see a lot more out-of-box variables that include Boolean checks on whether a user profile property has information in it. The display template uses these variables to decide whether to show property sections about users. You may want to leave these as dynamically showing or, based on the mockup, have them always show to keep the result consistent for each user.
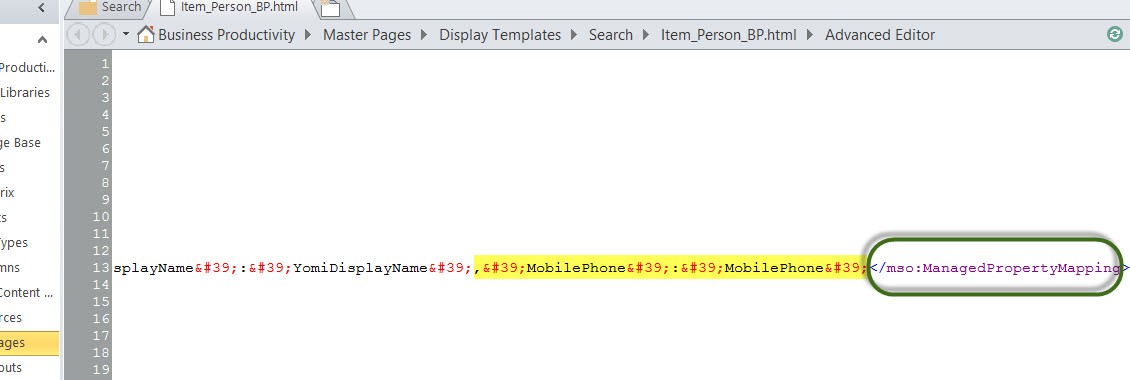
Next, we'll need to decide which properties to check for hiding sections and create variables to watch for this. Create these new variables at the end of the JavaScript section using your new mso:ManagedPropertyMapping properties values.
Note: The "'" you sometimes see in this line is the URL-encoded value for the single quote (‘). Put a single quote or the URL-encoded value around the managed properties name for them to show.
Scroll down some more until the beginning of the HTML, <div id="_#"$htmlEncode(containter_id)=#_"class+"ms-srch-people-outerContainer ms-srch-resultHover">, and you'll notice there’s quite a bit more HTML and embedded JavaScript checks than any other of the display templates. This is where SharePoint is using the Boolean variables defined above to show user profile properties only if they’re set.
Note: Based on the mockup, new HTML elements with CSS may need to be added, or just require changing of the default dynamic sections. Best practice is to make small changes, save often and preview after each change to make sure the template displays the way you want.
After doing all that hard prep work above, we can finally build out the directory. In your site collection or site, navigate to Site Settings and click on Result Types like before. In the top section of items defined for this site collection/site, hover over the person type we created and select the Edit menu. On the edit page, scroll down the actions section and, in the drop-down that currently says "People Item," change it to select our new display template (the reason for giving it a good title above). Click Save at the bottom of the page, and the page will refresh, showing that our template is now being used for all people results.

Now navigate to the site where you want the directory to be accessed from and select Site Contents > Site Pages. In the library, click on the +New link and give the page a descriptive name (e.g., Employee Directory, etc.), then click Save.
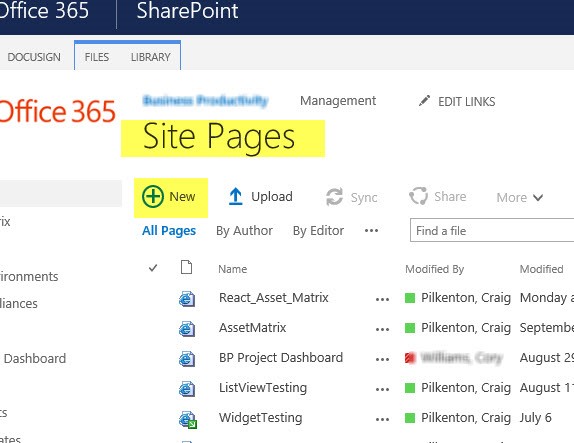
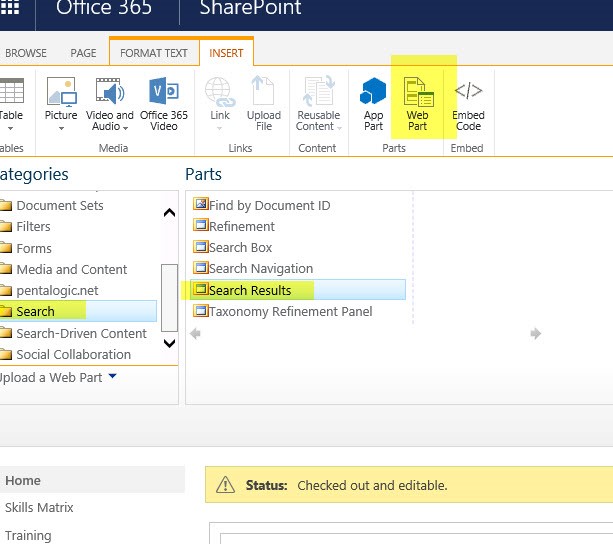
On the new page, click Edit if not already active and click in the left-most web part zone. Then in the ribbon choose the Insert tab, select Search in the right Categories scroll list, and finally click on the search results web part followed by OK to insert it.
Note: you can also use a content query web part, but I find the search result web part a little easier to work with.
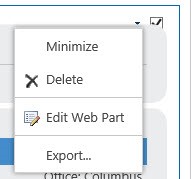
After the search results web part is added in the page, click on its top-right corner and select Edit Web Part. This launches the properties pane so we can configure the results.
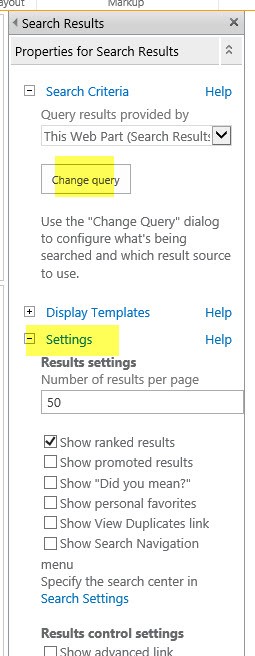
In the Edit Web Part menu, change the settings as needed. I usually use the following settings:
When ready, click on the Change Query button to launch the results wizard to configure what to pull from the search index.
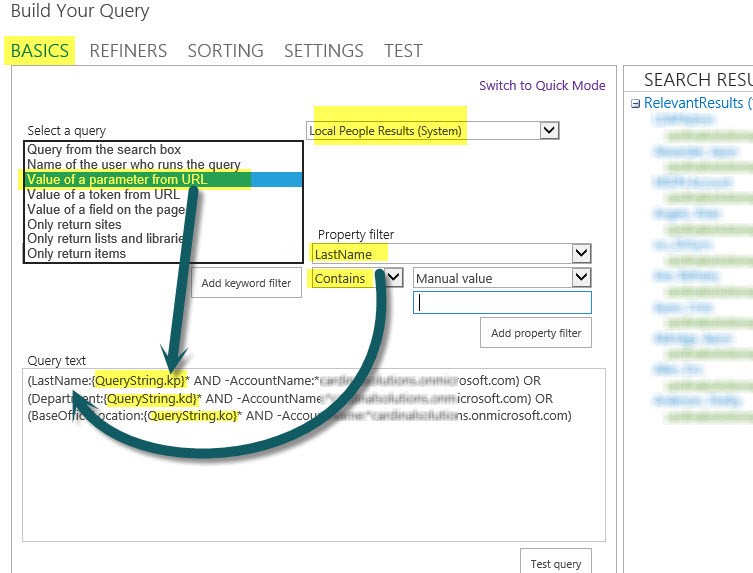
In the query wizard, the first tab showing is for the basics of using the tool. Start with changing the result source drop-down to Local People Results to filter just to people, then set up how you want the web part to receive input for searching. Since we want people results to show as soon as the user lands on the page, I change the Select A Query drop-down to use Value of a Parameter from URL. This allows me to use JavaScript to post back to my directory page with a key that tells it whether to show/filter people results by last name, department or office location. I then tie this key to a target in the search index to show/filter users (see property filter).
The query text box shows us our changes to the Keyword Query Language (KQL), which is what the search results web part will post for us to pull in results. In my example below, I’ll have a QueryString variable called "kp" that I'll pass, which will filter the value it has against LastName in the search index (e.g., ?kp=A), and the "*" at the end says add a wildcard at the end of the value so it gives me “fuzzy” matches.
Note: There are many ways to set this up, including the easiest of just giving users a search box, but a search box doesn't preload people results. Also, when I pass my QueryString variables, I set an “AND” condition to exclude any accounts not synced from on-premise AD.
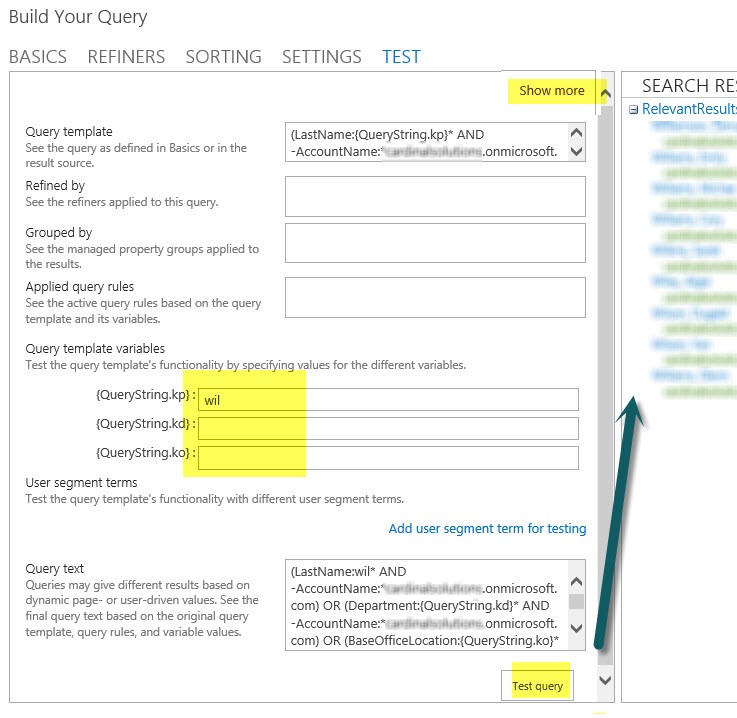
Now we click on the Test tab and then on the Show More link to open the full interface. In the middle query template variables section, input testing values and then click the Test Query button to verify users are being returned in the right panel as your filters state. When done, click OK in the wizard and then OK in the edit web part pane to save your changes.
Note: These query template variables will change, depending on the filters set on the basics tab.
After saving our web part and page, review the results coming back on the page and verify the new person display template is looking good. If you see any changes needed, just wash, rinse, repeat the above display template or search result filter steps until you get it as you want.
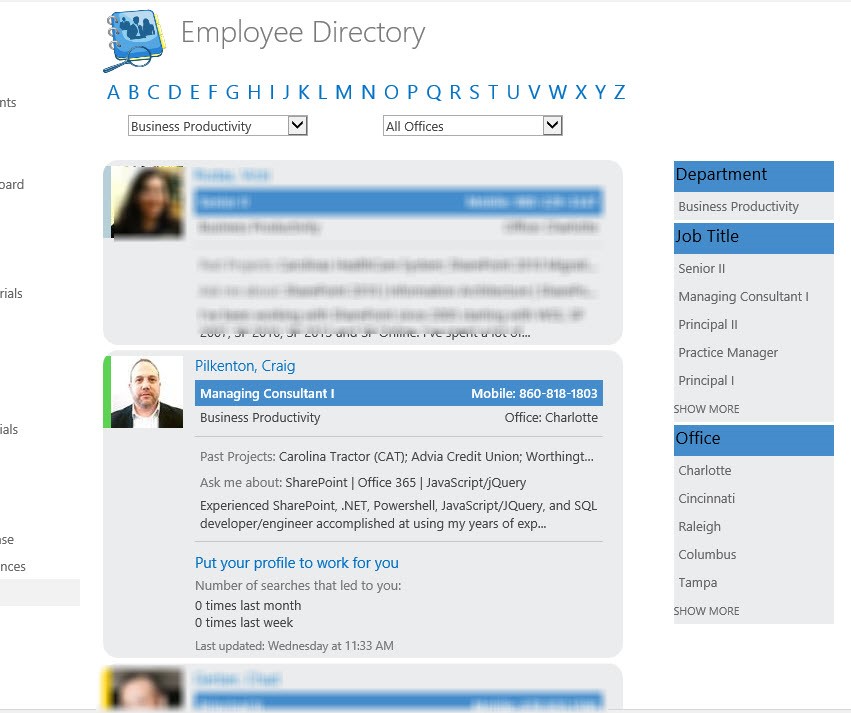
Although there are a number of steps to get set up, once you're done, you'll have a dynamically generated employee directory that has all the power and capability of search. The best part is no one ever again needs to pester users about updating their contact information as it pulls from the core source of this information and shows the updated values as the search index finds them.
Advertisement