Tech tutorials Xamarin.Forms Tutorial — Adding Google Analytics
By Insight Editor / 24 Jan 2017 , Updated on 16 May 2019 / Topics: Application development
By Insight Editor / 24 Jan 2017 , Updated on 16 May 2019 / Topics: Application development
This article describes integrating Google Analytics into Xamarin.Forms mobile applications. In particular, we’ll demonstrate how to incorporate screen views into the iOS and Android solutions.
We’ll start with a new project. Using Xamarin Studio, choose File -> New Solution from the menu. When presented with the following dialog, Choose Forms App and click Next:

On the subsequent screen, fill in your project name and be sure to select Use Portable Class Library in the Shared Code section. Below is an example:
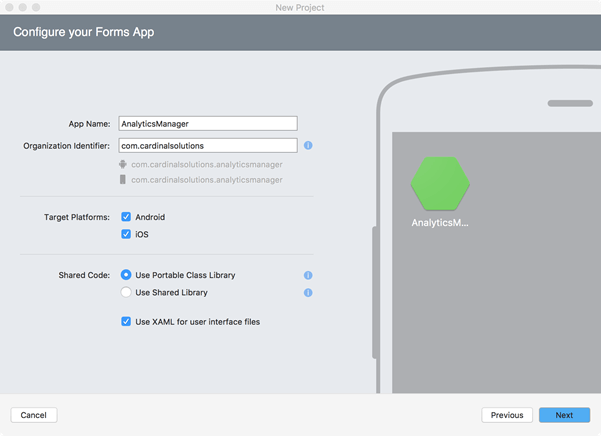
For this demo, we’ll use AnalyticsManager as our test application. Clicking Next will bring you to the following confirmation screen:
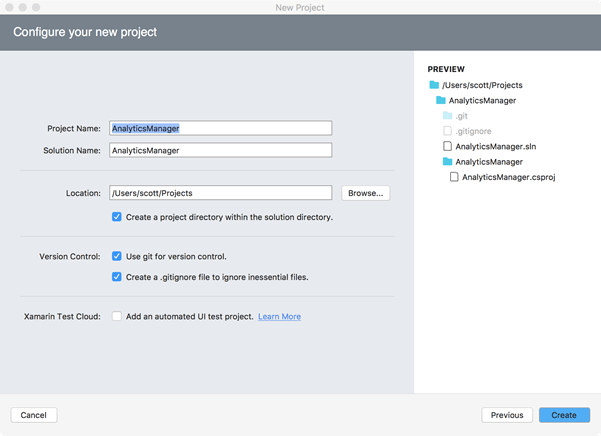
Once this final step is complete, you should see something similar to this in Xamarin Studio:
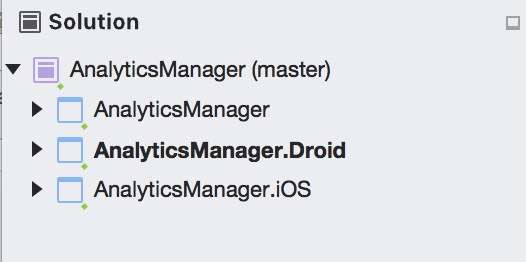
The solution is composed of three separate projects. AnalyticsManager is the main PCL project where shared code will reside. AnalyticsManager.Droid contains any custom code required for Android while AnalyticsManager.iOS contains any custom code required for iOS. We’ll be adding code to each of these projects.
The Portable Class Libraries (PCL) project will contain an interface used in Xamarin ContentPages to record screen views. The native projects (AnalyticsManager.Droid and AnalyticsManager.iOS) will contain the platform-specific implementations of the interface defined in the PCL project.
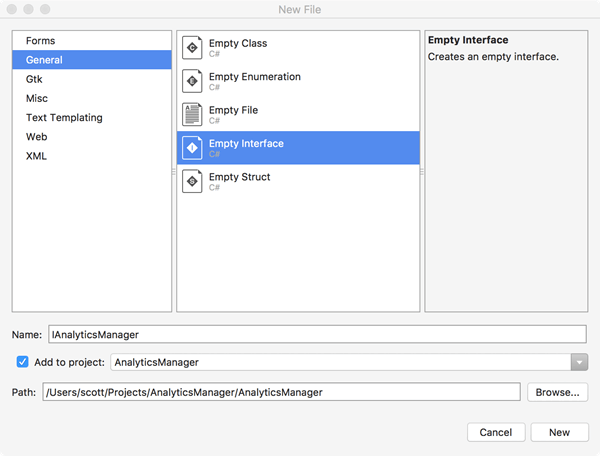
Our first bit of code will be an interface, called IAnalyticsManager, and will be defined in the PCL project. Highlight the AnalyticsManager project and select File -> New File from the menu to display the following dialog:
using System;
namespace AnalyticsManager
{
    public enum ScreenName { Login, Main}

    public interface IAnalyticsManager
    {
        IAnalyticsManager InitWithId(string analyticsId);
        void TrackScreen(ScreenName screen);
    }
}
The ScreenName enum contains values that represent screens in your application. For demonstration purposes, only Login and Main are represented in this project.
InitWithId represents a method that, when called, initializes the native Google Analytics framework with the given analyticsId. The analyticsId is defined in the Google Analytics portal and generally follows the pattern UA-xxxxxxx-x. An example of this method’s use will follow shortly.
TrackScreen represents a method that will be called by each ContentPage in our PCL app, passing in one of the ScreenName enum values. Again, each native project will provide an implementation for this method.
Fortunately, NuGet packages for Google Analytics exist for both iOS and Android Xamarin Native projects. These packages wrap the underlying native implementations of Google Analytics and, therefore, have slightly different syntax from platform to platform.
To add the iOS NuGet package, select the Packages folder in the AnalyticsManager.iOS project, right-click and select Add Packages… to display the following dialog:
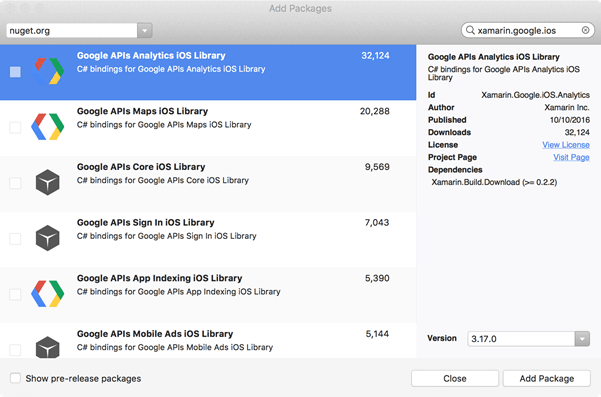
Find and check the Xamarin.Google.iOS.Analytics package and press Add Package. You should now see that package listed in the Packages folder.
To add the Android NuGet package, select the Packages folder in the AnalyticsManager.Droid project, right-click and select Add Packages… to display the following dialog:
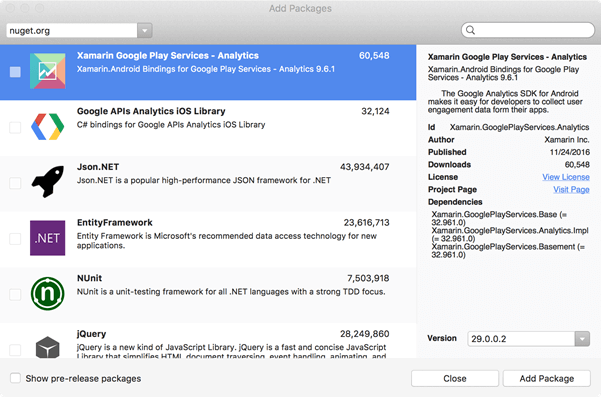
Find and check Xamarin.GooglePlayServices.Analytics. We’ve chose version 29.0.0.2 here. Click Add Package, and you should now see that package listed in the Packages folder.
Now that the NuGet packages for each native platform are installed, we can now create each platform’s implementation of IAnalyticsManager.
To add the native iOS implementation of IAnalyticsManager, highlight the AnalyticsManager.iOS project and select File -> New File to display the following dialog:
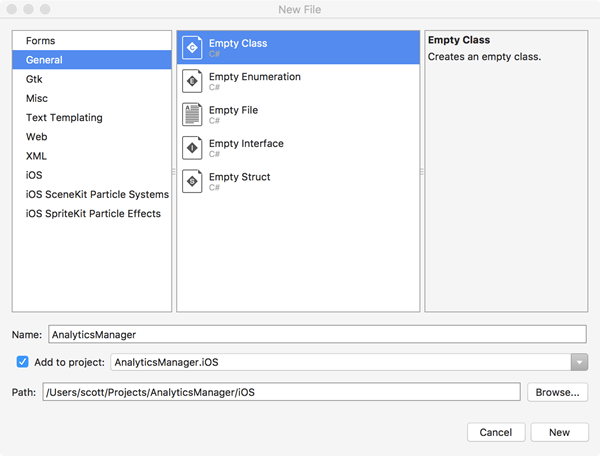
Choose General – Empty Class and provide AnalyticsManager as the Name of the class. Also, make sure AnalyticsManager.iOS is the chosen project.
Now, we supply the implementation of the two methods defined in IAnalyticsManager in the PCL project. Here is the complete implementation of AnalyticsManager:
using System;
using Google.Analytics;
using Xamarin.Forms;

[assembly: Dependency(typeof(AnalyticsManager.iOS.AnalyticsManager))]
namespace AnalyticsManager.iOS
{
    public class AnalyticsManager : IAnalyticsManager
    {

        private static Gai gaInstance;
        private static ITracker tracker;

        public IAnalyticsManager InitWithId(string analyiticsId)
        {
            gaInstance = Gai.SharedInstance;
            gaInstance.DispatchInterval = 10;
            gaInstance.TrackUncaughtExceptions = true;
            tracker = gaInstance.GetTracker(analyiticsId);

            return this;
        }

        public void TrackScreen(ScreenName screen)
        {
            tracker.Set(GaiConstants.ScreenName, screen.ToString());
            tracker.Send(DictionaryBuilder.CreateScreenView().Build());
            gaInstance.Dispatch();
        }
    }
}
Note the Dependency service reference at the top.
To add the native Android implementation of IAnalyticsManager, highlight the AnalyticsManager.Droid project and select File -> New File to display the following dialog:
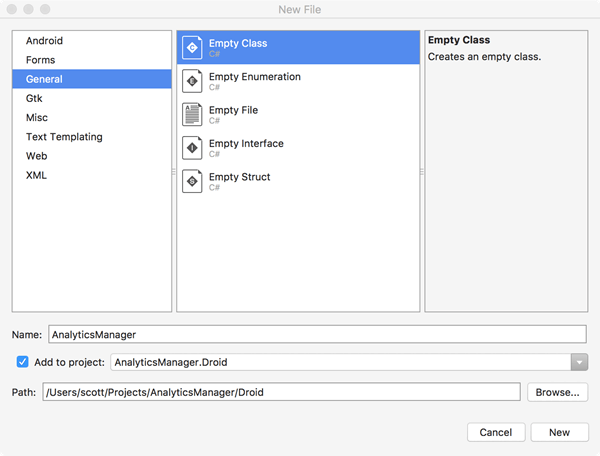
Choose General – Empty Class and provide AnalyticsManager as the Name of the class. Also, make sure AnalyticsManager.Droid is the chosen project.
Now, we supply the implementation of the two methods defined in IAnalyticsManager in the PCL project. Here is the complete implementation of AnalyticsManager:
using System;
using Android.Gms.Analytics;
using Xamarin.Forms;
using AnalyticsManager.Droid;

[assembly: Dependency(typeof(AnalyticsManager.Droid.AnalyticsManager))]
namespace AnalyticsManager.Droid
{
    public class AnalyticsManager : IAnalyticsManager
    {
        private static GoogleAnalytics gaInstance;
        private static Tracker tracker;

        public IAnalyticsManager InitWithId(string analyiticsId)
        {
            gaInstance = GoogleAnalytics.GetInstance(Android.App.Application.Context);
            gaInstance.SetLocalDispatchPeriod(10);
            tracker = gaInstance.NewTracker(analyiticsId);
            return this;
        }

        public void TrackScreen(ScreenName screen)
        {
            tracker.SetScreenName(screen.ToString());
            var builder = new HitBuilders.ScreenViewBuilder();
            tracker.Send(builder.Build());
            gaInstance.DispatchLocalHits();
        }
    }
}
You’ll notice a different syntax for the two implementations. Also, take note of the Dependency line, similar to that in the iOS version.
Now, let’s put our new code to use. Open the code behind AnalyticsManagerPage.xaml.cs and modify it as follows:
using Xamarin.Forms;

namespace AnalyticsManager
{
    public partial class AnalyticsManagerPage : ContentPage
    {
        public AnalyticsManagerPage()
        {
            InitializeComponent();
            var analyticsManager = DependencyService.Get<IAnalyticsManager>();
            analyticsManager.InitWithId("UA-xxxxxxxx-x");
            analyticsManager.TrackScreen(ScreenName.Main);
        }
    }
}
Of course, you’ll have to supply a real tracking id for InitWithId method call. You’ll notice the use of DependencyService here to load the platform-specific implementation. You’ll also notice ScreenName.Main is being passed into TrackScreen.
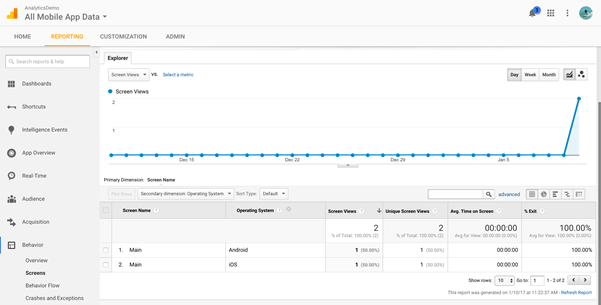
Once you run your app for both iOS and Android, you should see screen views logged in on the Google Analytics console. Here’s an example of the console:
That’s all there is to it. You should be able to extend this approach to support Google Analytics custom metrics and dimensions as well.
Advertisement